Back to docs
Domains
Domains: Add, Verify, and Enable Sending
Learn how to add domains, configure DNS records, verify setup, and safely enable sending.
Audience: New and growing customersTime: 12-20 minutes
Updated April 2026
Before you begin
- DNS provider access
Table of contents
1) Add a domain
The domain record must exist in your workspace before DNS verification.
- Go to Domains and click Add Domain.
- Enter domain name exactly, for example example.com.
- Save and open the domain details page.
- Copy the generated DNS records from the DNS tab.
Add domain modal and list
Capture add-domain modal and resulting domain row in the domains table.
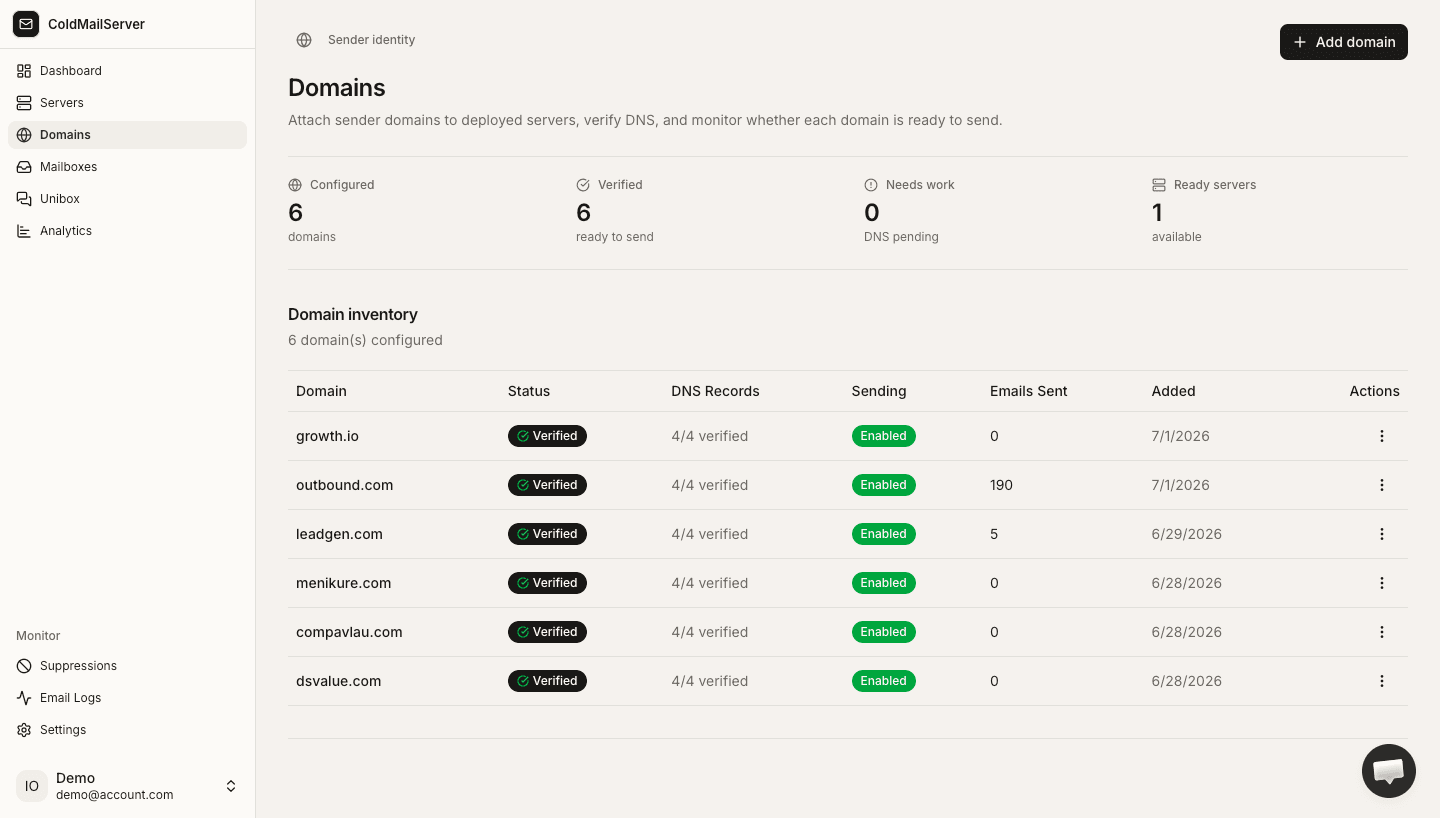
2) Configure DNS records
DNS records prove domain ownership and improve deliverability.
- Add DKIM TXT record exactly as displayed.
- Add SPF TXT record and ensure you only have one SPF record.
- Add DMARC TXT record, typically starting with monitoring policy.
- If receiving is enabled, add MX records as instructed.
Domain DNS records tab
Capture the DNS tab showing DKIM, SPF, DMARC, and optional MX entries with copy buttons.
3) Verify and enable sending
Do not send production traffic until verification succeeds.
- Click Verify DNS from the domain page.
- Wait for propagation and retry if status remains pending.
- When verified, open Settings tab for the domain.
- Enable sending and define daily and hourly limits.
Verification and sending toggle
Capture verify button, verification status badge, and sending toggle with limits in settings tab.