Getting Started
Getting Started with Cold Mail Server
This quick start guide helps you understand the product workflow, then complete your first setup: domain, mailbox, mailbox auth key, and test send.
Updated April 2026
Before you begin
- An active Cold Mail Server account
- Access to your workspace
- A domain you want to use for sending
Table of contents
1) Learn the product workflow
Cold Mail Server works as a workflow: identity setup -> sending auth -> campaign execution -> monitoring.
- Domains establish trusted sender identity.
- Mailboxes are your sending identities tied to domains.
- Mailbox Auth Keys connect your sending tool securely.
- Email Logs show delivery outcomes and message-level diagnostics.
- Settings and team controls keep operations consistent.
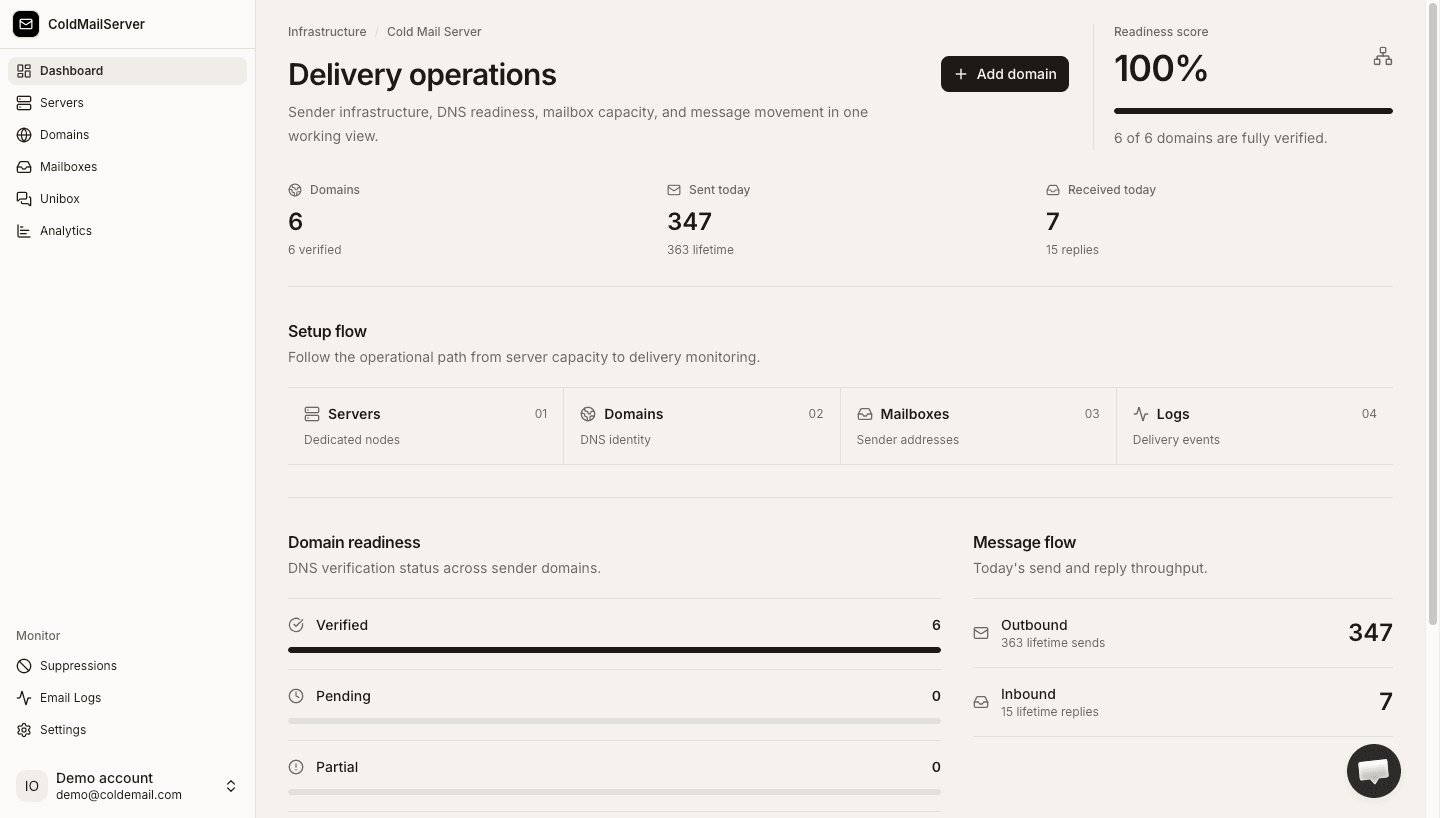
Product workflow and navigation
Capture the main app home with navigation and annotate the sequence Domains -> Mailboxes -> Auth Keys -> Email Logs.
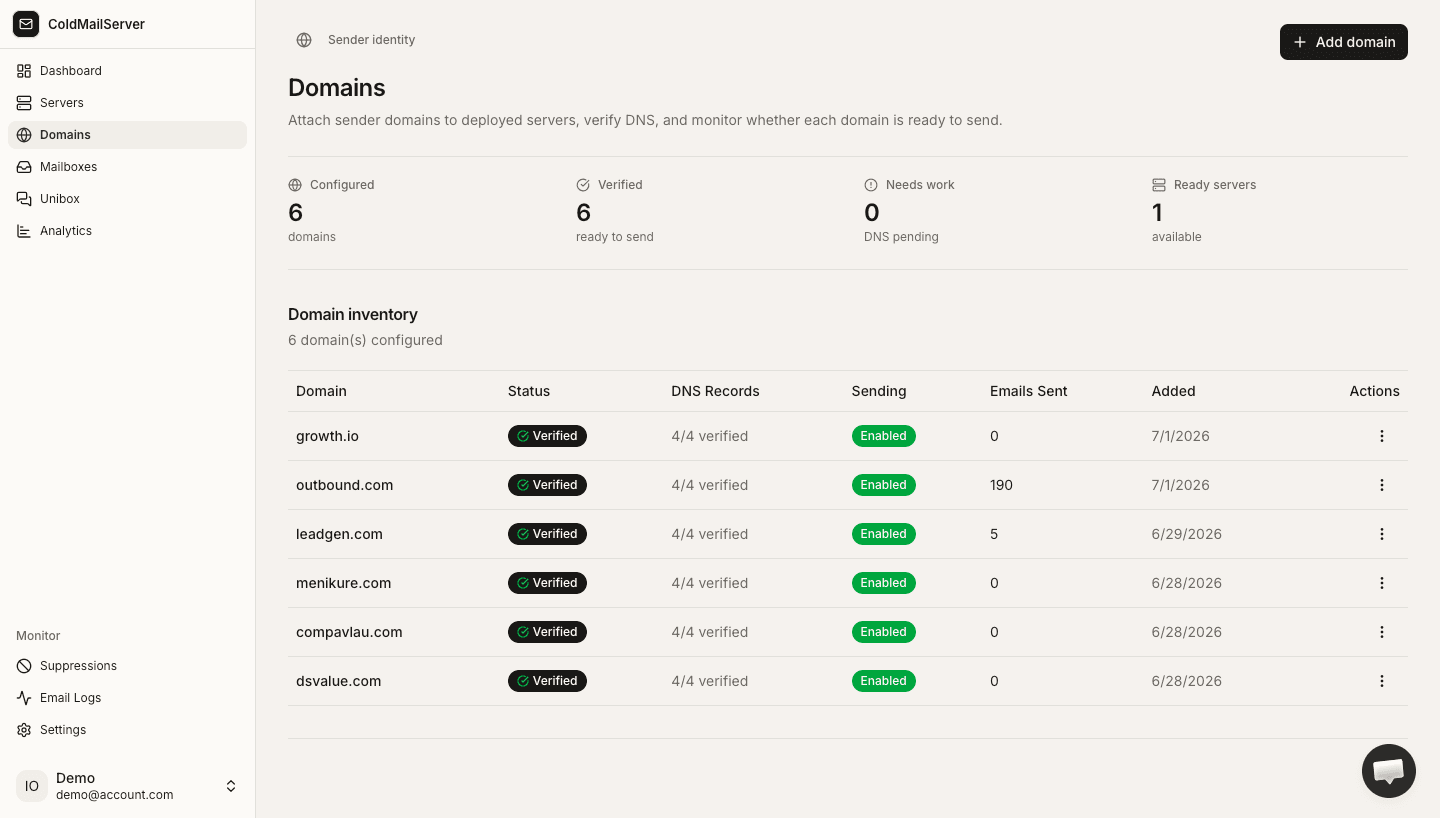
2) Add your first domain
Add a domain before creating mailboxes and sending emails.
- Go to Domains and click Add Domain.
- Enter your domain name and save.
- Copy the DNS records shown in the domain details page.
- Add those records in your DNS provider and click Verify DNS.
Add domain flow
Capture the add-domain modal and the follow-up DNS records screen.
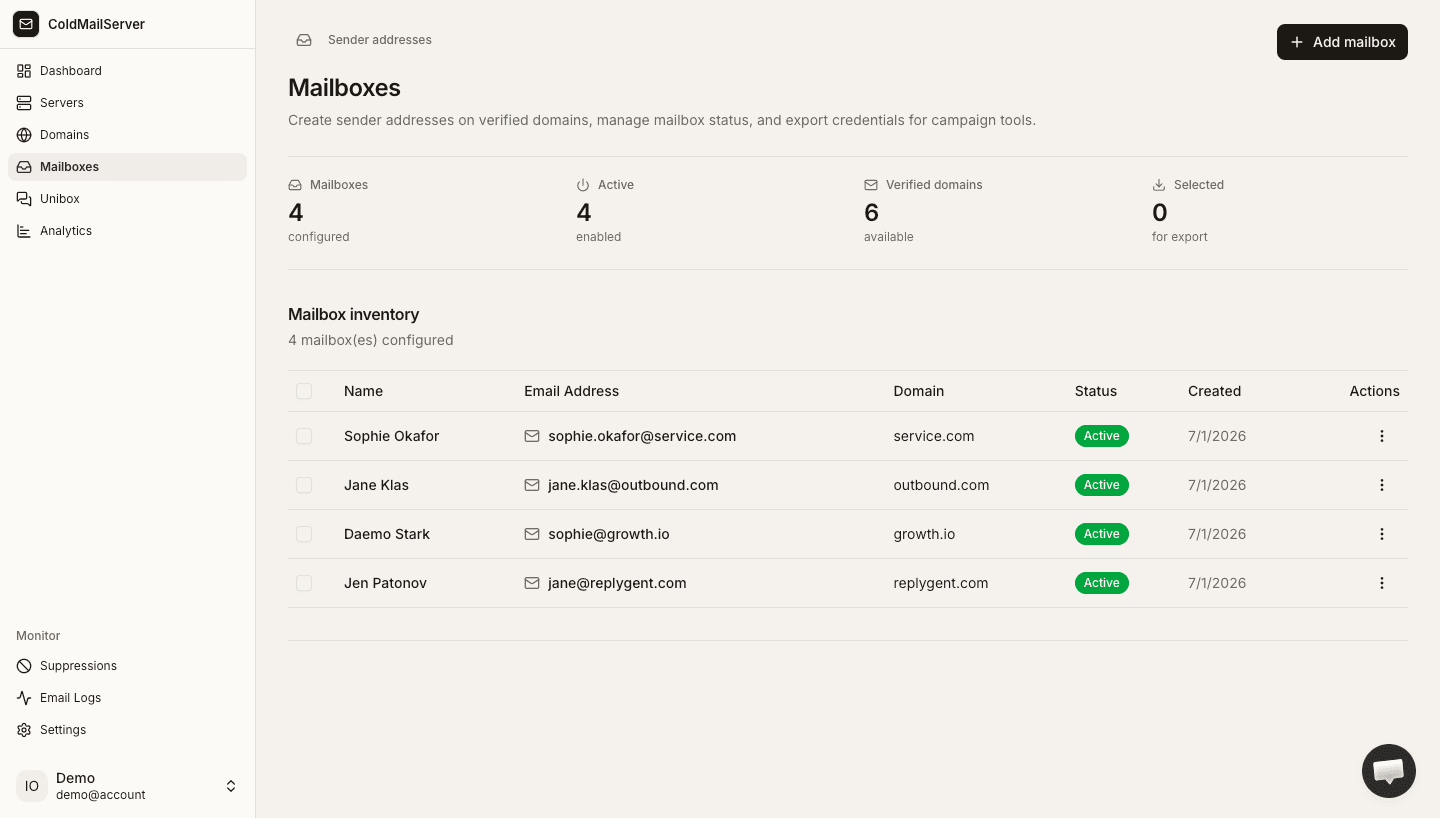
3) Create a mailbox and auth key
Mailbox plus auth key is what your sending app needs.
- Open Mailboxes and click Add Mailbox.
- Choose your verified domain and mailbox name.
- Open the mailbox auth key section and create a new key for that mailbox.
- Copy the key immediately and store it in your sending tool securely.
Mailbox creation and key generation
Capture mailbox create form and one-time auth key reveal view.
4) Send and confirm your first test email
A test send confirms setup is complete.
- Send a test email from your sending tool using your mailbox and mailbox auth key.
- Open Email Logs and filter to Sent to confirm delivery status.
- If needed, open message details to inspect headers and content.
- Once successful, continue to warm up and scale gradually.
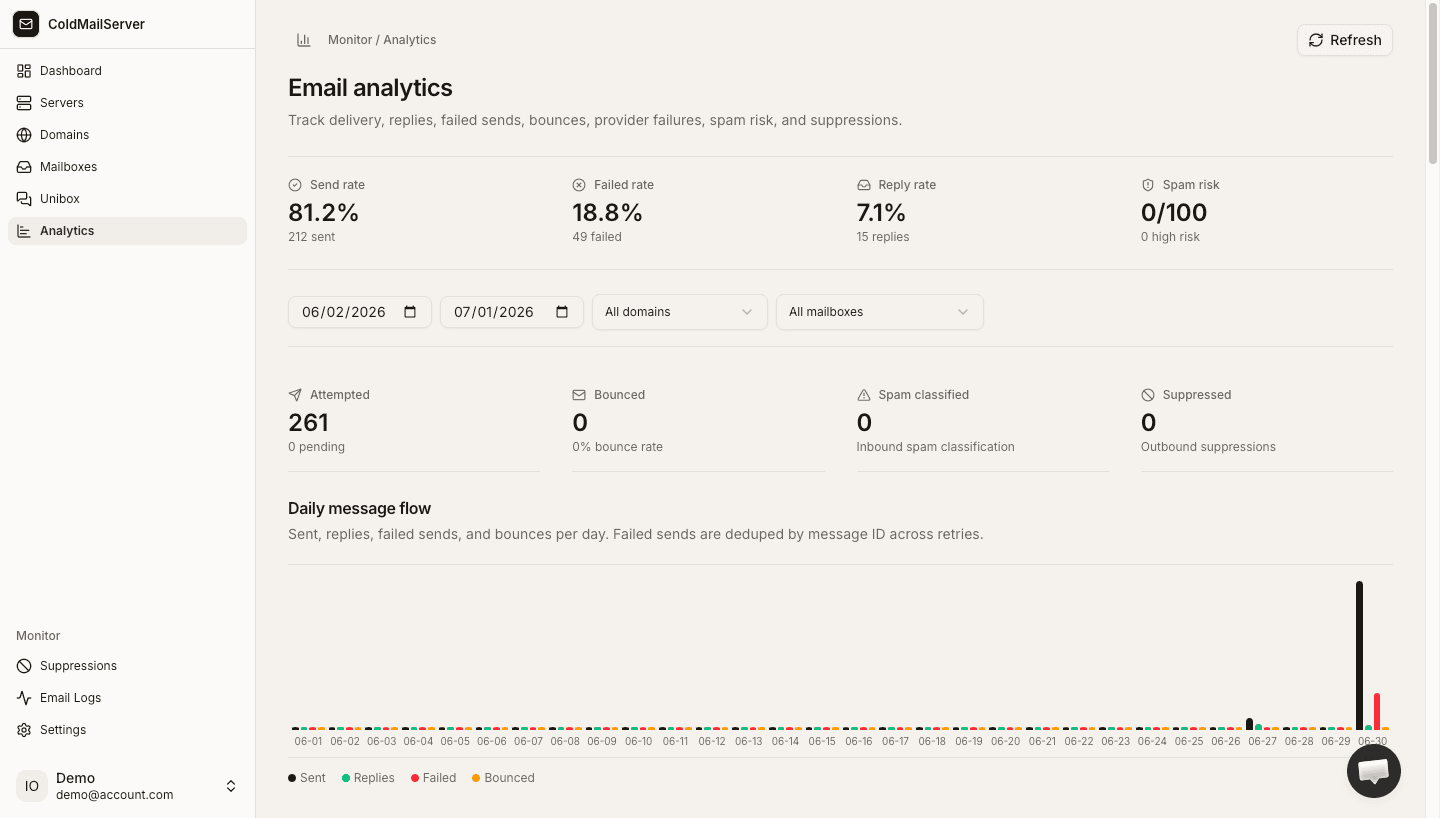
Test send confirmation in logs
Capture Email Logs showing a successful test send and opened message details.